Music reviews
&
helpful information about recording and mixing techniques. Posts written by professional engineers and musicians.
Learn about the inside secrets that engineers at Shine On Studio use in their sessions. Become a mixmaster and impress the world with your knowledge of audio production.
Gain Staging
Advice on how to make good use of the meters in your DAW and learn how to properly read them.
Getting the right levels in your mix is the very first part of the recording process. Paying attention to your input levels can pay dividends when it comes to the mixing process. Proper levels will yield a much more streamlined workflow when it comes to sitting down to mix.
So you maybe asking yourself, “What are the proper levels that I should be trying to achieve?“
The answer to this question can vary. You have to have a vision for the end result. If you don’t have that vision, then you should focus on getting levels that optimize your A/D converters. Most interfaces are calibrated for a sweet spot around -20dBFS to -16dBFS. Hitting this area as your target RMS level will almost always give you ideal tracks to mix.
Now if you’re sitting there scratching your head and not quite sure what all that means, don’t worry. Here’s a good rule of thumb to follow. Most meters in DAWs have a color coded display. Typically green is at the bottom followed by yellow, orange, and red. If you get your average level to hover right around where the green and yellow meet, then you’re in the ballpark. This means the middle point between your peak levels and your noise floor is close to that point where the meter changes colors.
Now of course it depends on what you’re recording. Different types of sound sources are going to give you different levels. Drums are going to have very sharp attacks that will yield higher peaks. Where as a vocal that isn’t too dynamic may just hover in the same area with little movement. One of the biggest problems that I see other engineers make is the level of their monitoring. Having your monitors up too loud or down to quiet will not truly give you a representation of the signal level. This is why you have to trust the meters and your DAW and let them show you what is actually happening with you levels. These are just pretty lights for you to look at while you’re working on your tracks. These are useful tools that can mean the difference between a good or bad mix.
It’s always a good idea to leave yourself some headroom when you’re tracking. You will want to have some space to mix and that is virtually impossible when your input levels hit -3dBFS or higher. Just be reasonable when you set your levels and keep in mind that you will be blending multiple tracks to mix down to your final print track.
AVID HD OMNI
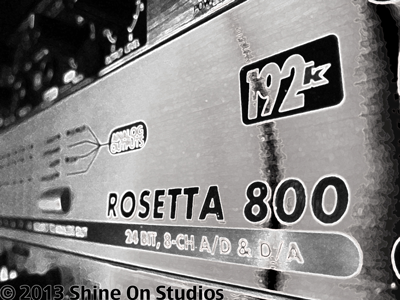
Shine On Studios is proud to announce the addition of the AVID HD OMNI system to our studio. This top-of-the-line HD interface for Pro Tools HD offers pristine A/D & D/A conversion with two high-end mic pre-amps. Paired with our Apogee Rosetta i/o, we now offer 8 additional channels of HD recording!
The studio is sounding better than ever. Tracks are clean and punchy! The clarity is amazing and Pro Tools 10HD offers our engineers so many ways to enhance and mix tracks. Everything from Elastic Audio to extremely low latency, gives every track produced at the studio that professional touch that makes them shine!


