
Music reviews
&
helpful information about recording and mixing techniques. Posts written by professional engineers and musicians.
Learn about the inside secrets that engineers at Shine On Studio use in their sessions. Become a mixmaster and impress the world with your knowledge of audio production.

External Hard Drives for Audio Production Recording & Mixing
Here are some SSD Hard Drive options for storing and backing up your Audio Production work. These drives work great with Ableton, Logic Pro, Pro Tools, Studio One and many other DAWs.
There are a lot of hard drive options out there and as technology advances, the options keep getting better and better. The main thing to consider is the transfer rate that will send information back and forth to your computer. Most DAWs require a drive that rotates at a minimum 7200 rpm for audio. Of all the dries that the studio has used over the years. Glyph has been the one that outshines them all. We started with those Glyph Key hot-swappable drives that were easy to move from studio to home and be able to take our work with us to keep ahead of deadlines. Now everything is much more streamlined. The Blackbox series from Glyph has been rock solid for us over the past few years. The rotating drives offer a lot of storage for a very reasonable price. You can snag up to 10TB for under $330. That’s a lot of storage space! The 2TB option is listed here and is a great starting point for any engineer.
If you want to up your game a bit, you should look at Solid State Drives. These rugged drives do not have a rotating disc, but instead have flash memory that can be recalled instantly. The price point on these SSD drives is a bit more because of the new technology, but they are worth every penny. This 1TB model is very slim and slender and travels quite well. We have one that goes with the mobile recording setup and it has performed admirably. Priced at $199.95, this drive is affordable for the amount of time you will save on your workflow. If you need to move your setup on a regular basis, I would suggest that you consider the SSD version. You will have a rugged drive that can take a few bangs and jolts and keep performing at the level any professional demands.

Good Mics for Podcasting
Thinking about starting a podcast? Here are some affordable mic options that will get you up and running right away.
Starting a podcast is a great idea now that we’re all stuck at home for the foreseeable future. You probably have an idea of what you want to talk about, so I’ll just cut to the info on microphones. There are a lot of options and some are affordable and some are outrageously expensive. Let me share with you some of the options that I have successfully used and been pleased with the results.
FIFINE Studio Mic Bundle
If you’re on a tight budget, the FIFINE Studio package is what you need. This bundle has a decent mic that will give you sound that is suitable for any podcast situation. The scissor arm and shock mount will allow you to position the mic for easy use and comfort if you’re tracking a lot and don’t want to be hunched over for a desktop mic. The pop filter will help you tame any rouge plosives that may happen as you talk. This will also help keep the mic clean. The 8’2” USB cable should be long enough for yo to position the mic any way that you like. Plus at $59.99, this bundle is affordable and provides you with a great setup for your new podcast endeavors.
SHURE MV51
This mic is great for more than just podcasting. However, I think it is best suited for podcasting based on the audio quality provided and the way that it connects to your devices. The USB connection on this mic offers options for connecting to a laptop or an iOS device. The MV51 is a bit more versatile and has a really cool look. The controls on the front of the MV51 make it really easy to adjust volume levels and mute the mic when you want to cut the feed. If you’re going to be doing a lot of podcasting, you might as well do it in style. The headphone output on this mic makes it really easy to connect and get going in a snap.
RODE PODCASTER
The Rode Podcaster is one of my favorites. It’s powered by USB and has a headphone output right on the mic. This package from Amazon includes a shockmount and boom arm to make your podcasting experience smooth and professional. Not much else to say about this mic because it acts as your interface and provides you with quality audio ideal for your podcast. Now if you have a newer computer with the USB-C connection, you’ll need to get an adapter for this mic. Not to worry, I’ve got a link for that adapter right here.
Rode NT USB Mini
This mic is a great option for a desktop mic that offers you all the necessities of a Podcast mic. This lil’ guy pack a big punch in a small frame. The USB connection on the mic is USB-C. Great for all the new laptops. The cable in the box is a USB-C to USB-A connection. So this will work with all the older laptops or desktops, too. The volume control on the front is easy to manage and this mic is really a great option for anyone on the go since it has a stand and is small enough to fit in any laptop bag. Just plug in your headphones and you’re all set to start tracking out your next podcast episode.
These are just a few options that I’m suggesting. There are many more possibilities. Be sure to budget for what you need and feel free to leave any questions or comments and I’ll get back to you ASAP.
Should You Be Mixing On BlueTooth Wireless Speakers?
If you’re checking your mixes on your car stereo system, you should also consider checking how bluetooth speakers reproduce your mix. Find out more about the speakers and which ones we recommend.
You probably have an Amazon Echo or Google Home wireless speaker in your house. Almost everyone has a BlueTooth wireless speaker and they are only going to become more popular. The portability of these small sound systems is going to start setting new standards for music production. Now that music lovers can take music with them anywhere they go, you’ll have to consider what your mixes sound like on these little sound systems. So Yes, you will need to start using these little monsters as part of your post-production workflow.
One of the ways you can start to incorporate these speakers into your workflow is to mix down an MP3 of your track and load it up on your smartphone. You could also put it on a streaming platform that allows you to keep the track private. Either way, you want to try and recreate how others will potentially listen to your music once it is publicly released.
You’ll need to check levels and listen to how the compression reacts to the small speakers. I just listened to a few major award-winning tracks on 2 of my wireless systems. When the bass line came in on both of them, the sound got swallowed and started pumping the cones. It didn’t sound very good and I actually removed the songs from my playlists. Now these songs may sound good on a larger system, but they didn't not make the cut for the smaller wireless systems. This is a big deal! If your mixes do not translate well to these little bundles of joy, you’ll find yourself looking for another job. That doesn’t sound like a lot of fun, so let’s look a few of the options that you can consider.
ANKER SOUNDCORE 2
I’ve had Anker Soundcore speakers around my home for a few years. They seem to last a long time on a single charge, so they’re good to have anywhere in the house or even in the backyard. You can now buy the new version and pair a few of them to a single source. This is good if you want to have sources to monitor in different parts of your home or studio.
They come in black, red, and blue. So you can pick a color that works with your studio decor. Right now there is a $5 coupon on almost every wireless speaker, so don’t wait and buy one today.
AMAZON ECHO
The wireless speaker system that is projected to be in every home in the USA by the year 2025. If you don’t already own one, it might be time for you to pony up and get one. To be honest, you could have more than one Bluetooth speaker in your studio to check your mixes. This line of devices will be the most common and probably should be one of the options you choose to use. I don’t recommend the little Echo Dot. Yet, it is popular, so maybe you do want one to use for reference. The nice thing about this line is that is has a SUB! For those of you that love bass, this may be a good option to check out.
UAD vs. Native Plugins
Two options that could make a big difference in your workflow and your wallet. Let’s look at some of the main similarities and differences between the two platforms.
Everyone is in the plugin business these days. It’s the modern way to work on audio production that has embraced the digital world. With so many options for plugins, there are some things to consider before you blow your kid’s inheritance on software. First thing is what DAW to choose and that should also go with what plugins are included with that DAW. Most of the DAWs out on the market all come with a decent set of stock plugins. So you have to consider if those stock plugins will be sufficient to get you going and give you the tools you need to start mixing the way you want. Now if you feel that you need to add to your toolbox and get some additional plugins to fine tune your mixing there are a few things to keep in mind. All the plugin companies have formats that should be compatible with most of the big DAWs, so you have quite a few options.
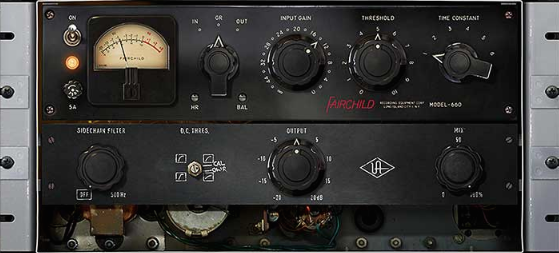
UAD Fairchild Compressor
Focus on plugs that give you something that you don’t already have in your system. Mainly a new tool that will enhance your mixes and give you the control you need to shape the mix. Compressors are bountiful and there are many different types out on the market. What do you need that you don’t already have? More color? Better transient control? The best way to find out is demo a few plugins and see if they give you the edge that you need. Most of the plugin companies will offer a trial period, which is exactly what you should do before investing. Even if you watch a video or someone tells you that you should buy a plugin, I always recommend running it through the trial period to give yourself some time to find out if it’s what you need.
Most companies offer native plugins. These are plugins that work with the DSP processing power of your computer. They’re great because you don’t need any extra hardware to run them. The only limitation is the processing power of your computer. One of my favorite native plugin companies is Plugin Alliance. These plugins are modeled emulations of some great pieces of gear and they sound great. The audio quality is clear and gives you the sound that your mixes need.
Now if your computer doesn’t have the power to run these native plugins, you can look into getting a UAD system that provides the DSP processing for your plugins. Universal Audio has a line of interfaces and satellite boxes that allow you to run the UAD plugins. The Apollo system has many options and price points and this makes them a good option for any studio setup.
You can get the same plugin on both UAD and Native platforms. So do you need to have both versions? I’d only say yes if you need to delegate your DSP processing. I’ve used both platforms and I don’t notice any big differences between the sound. I’ve done null tests on the plugins and they cancel out when the phase is inverted. The main difference is the way the plugins run on the system and the price. UAD is a bit more expensive, but does free up the DSP on your computer for other plugins and processing.
I recently asked a question on the Plugin Alliance forum to find out how everyone felt about the differences between Native and UAD plugins. You can read the comments here.
If you have anything to add to this discussion, please leave a comment.
Prism Sound Titan
Prism Sound is a UK based company that offers some of the industries best audio interfaces. The Titan is the most affordable for the features that are offered.
I’ve added a new flagship interface to the studio to add more clarity and depth to our production. I met Frank Oglethorpe at an event in San Francisco and got to hear the Atlas & Titan in action. The audio detail was giving me chills and put me in a space where the music was visual.
The Titan was in a small studio room that had treatment on the walls. It was an ideal situation to test out the ability of the DA and hear some recent mixes I’d just finished vs. mixes at the hosting studio. There was a difference in the low end where the frequencies had more depth without the mud. I immediately knew I had to demo a unit at my studio to hear if the mixes benefited from the converters in the Titan.

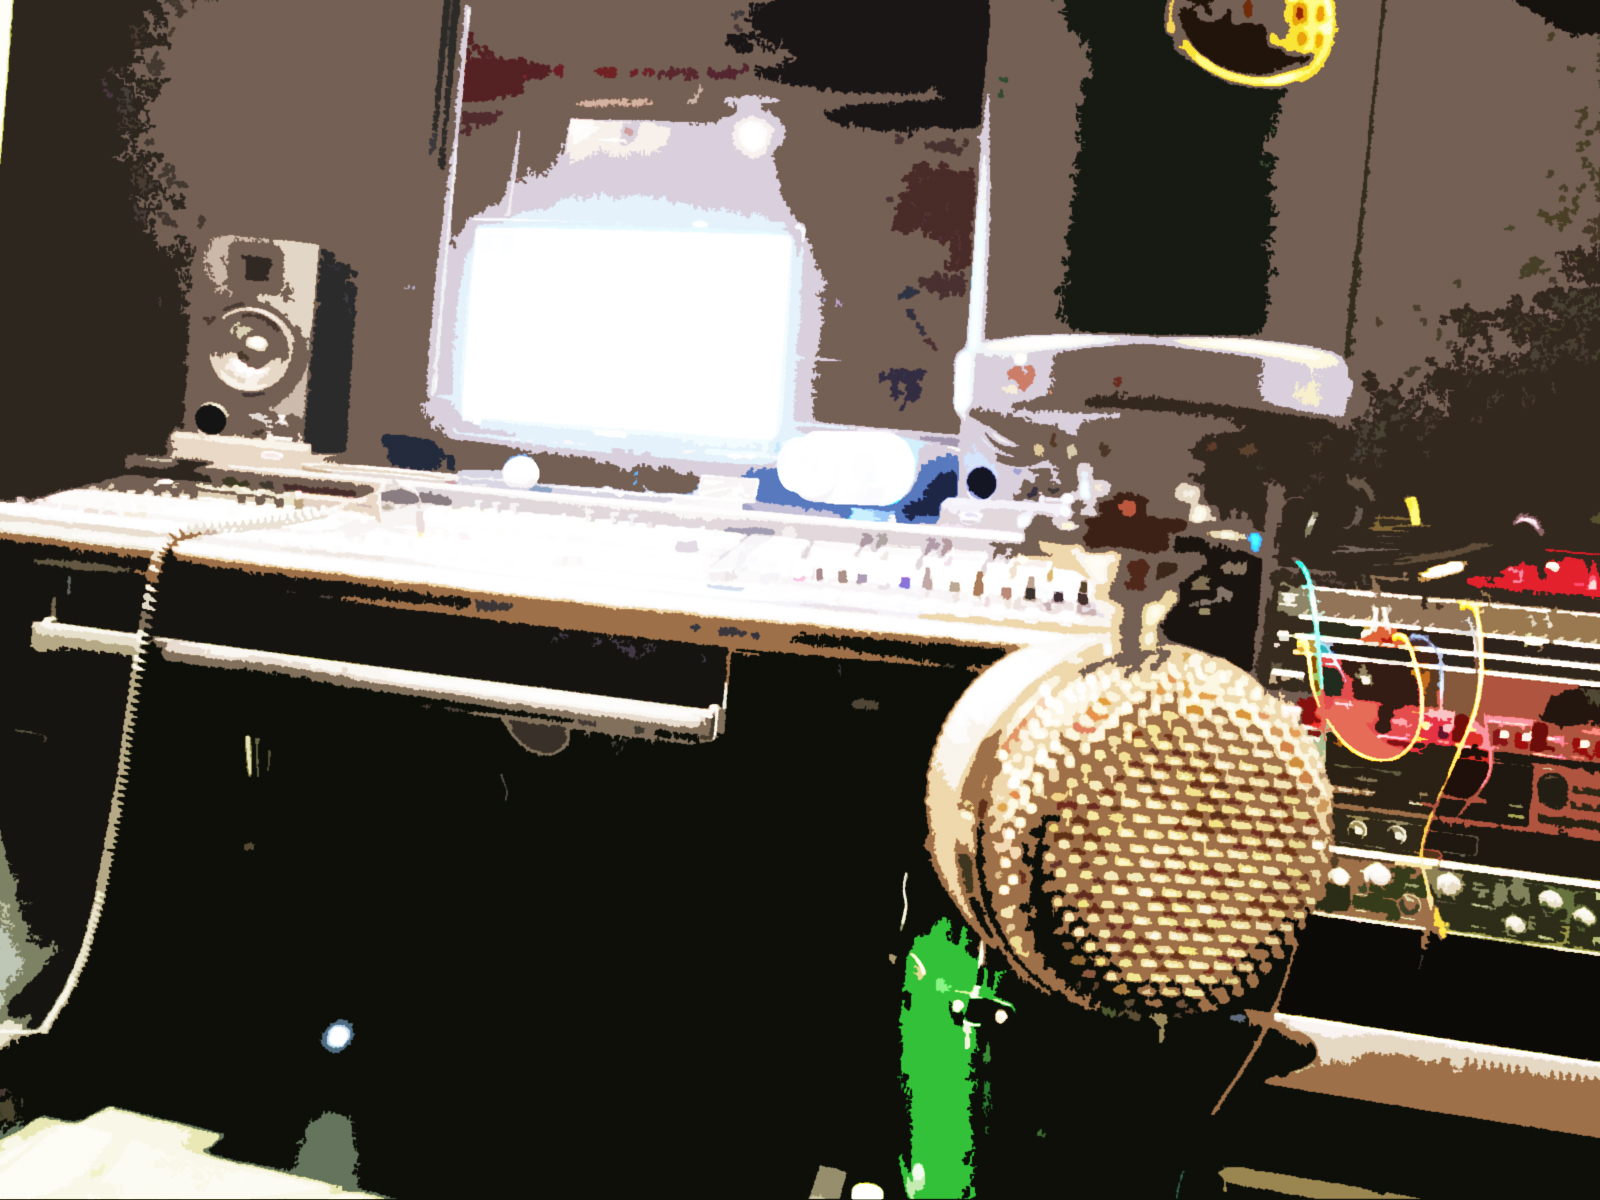
Engineer David Hughes at Shine On Studio.
I connected with Jeff Briss from Cutting Edge Audio and got the approval from Frank to demo a Titan. When it arrived, I wasted no time connecting it to the HDX system. The first mix I played came to life and filled the room with rich detail and precision clarity. My eyes got large and my ears were saturated with excitement. This was such an amazing experience that I knew a Titan was the missing piece for the studio.
I’ve had the Titan now for a few months and the response is exactly what I want to hear from my clients. Everyone loves the full sound and clarity that the audio has on every system they playback their music. This was a serious investment and it has already paid dividends that make it worth every penny.
I highly recommend Prism Sound and their audio interfaces. Send me a message and I’ll hook you up with info on how you can connect with the right people to demo a unit for yourself.

Mixing with Headphones - Which Ones to Use?
Mixing with headphones can be productive if you follow a few helpful steps along the way. Let's discuss the advantages and disadvantages of mixing with headphones.
This is a question that seems to come up quite often, so here are my thoughts and some recommendations for mixing with headphones. First thing is that it is OK to mix with headphones. Lots of great albums have been mixed on headphones and you can get a professional sound. For many DIY musicians and home studio engineers, the mixing room is not always optimal for sound. A decent pair of headphones will give you a more accurate presentation of your mix.
Now here is a main factor to consider, the quality of your headphones really does matter. Not all headphones are created equal. Some headphones are designed specifically for the studio and others are designed for listening and playback. So how do you know what is the difference between headphones? Most studio headphones actually put on the packaging that they are studio headphones. But words don't necessarily mean that you will get the quality needed to mix properly. It is always advisable to listen to a pair of headphones before you commit to buying them. I don't recommend buying headphones because of the name brand or because someone famous endorses them. Companies are in the business of selling their product, so you can't just take their word or reputation for granted.
I've owned lots of different headphones over the years and some are good for recording, some good for mixing, and some good for listening and enjoyment. Every pair of headphones I've owned have had their own strengths and weaknesses. It just takes time for you to get used to the sound your headphones provide so that you can be productive in your mixing choices. If mixing with headphones is the route that you plan to take for your post-production, I'd suggest getting a decent pair of headphones. Many of the headphones in the $99 - $199 price range will give you a decent representation of your mix. Let me give you my experience with a few different models that are out on the market.

Sennheiser HD 280 Headphones
When I was starting out, I used Sennheiser HD280headphones for recording and mixing. These are great headphones for all applications and music. They have rich detail in the low-mids and don't get too harsh in the upper frequency range. That's a bit of good news for your eardrums. These headphones are comfortable and do collapse down for easy transport from one place to another. I'd say the big plus for these headphones is the price. At under $100, these are some of the most affordable professional headphones you can buy. Especially if you're on a budget and would rather spend your money on gear or mics. The ear pads can be replaced when they get old and worn out, so you can keep the feel of these headphones in a feels-brand-new fashion at any point.
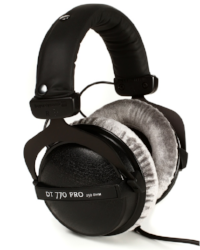
Beyerdynamic DT 770 Pro
I moved on to a pair of Beyerdynamic DT 770 Pro studio headphones. I was initially impressed with the comfort, quality, and sound of these headphones. I demoed a pair at a local pro audio shop and a few minutes later walked out with a brand new pair for the studio. Now these are a bit more price-wise, but you get quite a bit for your money. The large ear pads are extremely comfortable and they don't squish your ears against your head. This was a huge plus right off the bat for me. For $199, I felt like I purchased a quality pair of headphones that would give me many great hours of recording and mixing. I used these headphones for about 2 years and mixed some of my favorite albums with them. Yet as the years went by, I started to be a little more critical of my mixing and felt that these headphones were not giving me enough detail on the high-end. This was frustrating, so I went back to search for a new pair of headphones. However, I do still use these headphones for recording and mixing from time to time. I still like the comfort and the relaxed feel they provide. Most of my clients prefer this pair of headphones when they're tracking and I agree that these are headphones that you can wear for a long period of time and not get too fatigued.
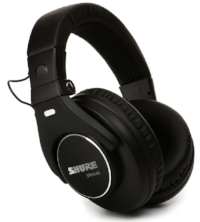
After some research and field testing of some different headphones, I decided to go with the Shure SRH840 professional studio headphones. There are a few reasons I chose this pair of headphones and I still feel like these are the right pair for most studio applications. The ability to easily replace the ear cushions and the cable are big advantages, so I'm already a little happier. This is just the tip of the iceberg. The sound quality of these headphones is transparent and dynamic. The drums that I've mixed with these headphones are crisp and punchy without being too muddy or boomy. I've also been able to get a better vocal balance in my mixes with these headphones. Having a good vocal balance can really make or break a song. You have to have faith in your headphones to give you a clear representation of your mix. To be able to trust your ears and rely on your headphones is crucial. These headphones are comfortable for short periods of time, but a long studio session can be rude to your ears and neck. These headphones are a little heavier than some other pairs I own and I notice that my neck can get cranky if I rock the headphones for too long. Overall, these are the best pair of headphones that I could find under $200.
Now one thing to keep in mind is that I don't solely use headphones to work on my mixes. I also use the studio monitors, but I regularly check my mixes with headphones. I recommend taking regular breaks if you are using headphones. Give your ears some time to recover and unwind from the constant noise that is only inches from the eardrum. These are just a few of the headphones that I own and/or have used in my career as a musician and producer. There are so many options out there and manufacturers keep improving on the designs, but I stand by my original statement that you need to go out and actually put the headphones on and listen to them for yourself.
Sometimes it is good to use earbuds to check your mix. You may be asking yourself, "Why would I use earbuds to check my mix?" Well, good question. The main reason is that your mix will most likely be heard on earbuds by the majority of listeners. Mobile music is the new trend and everyone has earbuds with their phones and MP3 players. So get in the game and make sure you are covering all your bases.
I did just purchase a pair of the Focal Spirit Professional headphones as a personal pair for my own listening enjoyment. I haven't had enough time to evaluate them, but my first impression is that they are on par with the BOSE noise-cancelling headphones. The ear cushions are quite snug and I don't know if I would use them for mixing. When I have more experience with them, I'll post my thoughts.

Plugins - An open discussion
There are way too many plugins out there and you may feel confused on which ones to buy and incorporate into your workflow. Here is an open discussion for you to ask questions and get insight for all those plugins. I'll regularly post any new releases or deals that I come across for those plugins that you should consider adding to your system.
Building a Home Studio | Part 2
PC or Mac, this is the ultimate question. If you're unsure of which one to get, you can always get a Mac and install parallels to run both platforms. A PC will ultimately be a little more affordable and have multiple options for a decent DAW.
I have personally had both computers and over the years have settled on a Mac. I started with a G4, then moved to a G5, and now I currently use a Mac Pro. If you're going to run a ProTools HD system, you'll need a computer that can handle PCIe cards. You can buy a chassis to house the PCIe cards, but then that is one more cable and device on your desk.
Be sure to get a computer with a fast processor and at least 8 GB of RAM. The i5 & i7 processors are excellent options for audio production. If you're not quite sure what to choose, call a specialist. I work directly with Joseph Secu at Sweetwater.com (800) 222-4700 x1232.
Also be sure to get a good monitor. With all the mainstream TVs having the ability to connect via HDMI or VGA ports you can have a large selection of monitors to choose from. Being able to see what you're working on is very important. You're going to be staring at this computer screen for hours on end, so it would be a good idea to invest in a screen that doesn't strain your eyes.
Tomorrow we'll cover microphones.
How to start a recording studio | part 2
Now you've got your computer and interface all ready to go. It's time to pick out a microphone or two so you can start recording. There are so many options out there and the prices are all over the place. Keep your budget in mind and remember there is more gear needed to complete the studio. So be reasonable about what you can afford.
BLUE KIWI • Main Vocal Mic
At the very least, seek out a decent vocal mic. Vocals are such a big part of the music that it pays to have a clean vocal mic. If you have the budget, I highly recommend the BLUE KIWI mic as your main vocal mic. It's produces a very clean sound and has impressive detail in capturing vocals. I use this mic on a daily basis at the studio and it has been my go-to mic for years. Now, this is not an entry level mic at $1,999, so don't buy it if your budget doesn't allow this expense. There are other mics out there, so do a little research and find one that works for your setup. The RODE NTK is an excellent utility mic that can track vocals and then be used to record a kick drum. The tube in the NTK gives the signal a nice analog warmth that helps tracks sit nicely into the mix. I've used my NTK on guitar amps, acoustic guitars, vocals, drums, congas, violins, and a slew of other instruments. All the tracks sound great, so this mic is well worth the investment.
Now your budget might be tight, so not to fret, there are some great options out there for a budget studio. Blue makes a few smaller versions of their flagship mics. The REACTOR is a great mic if you can find one. They're about $500 brand new and they have the same capsule as the KIWI. The Blue Bird is another excellent option and it is another versatile mic that can be used for many different applications. Right now Sweetwater.com is offering a Blue Bird mic + a Focusrite Scarlett interface for $299. That's a good deal for getting yourself up and running.
The staple mic is the Shure SM58 and you can never go wrong with this mic. It is built like a tank and can take a beating and still provide quality audio recordings. This mic is under $100 and will give you solid recordings on almost anything you put in front of it. Now it's not designed to be used as a multipurpose mic, but I've had good results from using it as a snare mic and a vocal mic. If you want a solid instrument mic, the Shure SM57 is your new best friend. It is a universal mic for anything that needs to be recorded and it is also built like a tank. This mic is the go-to mic for many engineers for tracking snares, guitar amps, toms, and sometimes vocals. Very affordable and extremely versatile are the big bonus points for these two mics.
I could go on and on about all the different mics, but these are just some of my favorites. If you have a question about a mic or want to know what I think about a particular mic, just post a comment here and I'll respond as soon as I can. Now get back to recording!
Drum mics | Kick Drum Recording

The biggest drum seems like the easiest drum to mic, but this big fella can be tricky at times. You really have to pay attention to the music. The tone of the kick drum needs to match the tone of the music. This requires selecting and placing the right mic in the right spot to capture the tone that you need.
There are a few options I recommend. The Shure Beta 52 is a rock solid mic for any recording. It provides depth, punch, clarity, and snap that works well with virtually every recording. You can never go wrong when using this microphone to record your kick drum.
My backup mic is the AKG D112. This egg-shaped mic is versatile for many recording applications, so it's an excellent choice for those of you on a tight budget. Besides kick drum tracks, this mic works well for recording any instrument that has a lot of low-end detail. I've used this microphone to record congas, bass guitar, trumpets, horns, and vocals. So for the $199 price tag this mic carries, it's well worth the investment.
The third microphone that I recommend is a little unorthodox. The RODE NTK is a secret weapon that I like to use when I need a bit more slap in the kick drum. It's a tube-based condenser that has a magical sound when placed in just the right spot. Usually I find that spot slightly off-center in front of the drum head. The $499 price on this mic does put it in the slightly expensive category, but this mic can do it all. From vocals to acoustic guitar, this mic is excellent on almost any recording.
Hope this helps you get better kick drum recordings. Happy tracking.
Vocal mixing tips and secrets: Mic Placement
Everyone is looking for advice about how to get those sweet full-sounding vocals into their mix. There are many options out there and I can only offer my thoughts and experience, but I encourage all engineers to think outside of the blog, book, or videos. Come up with your own way of recording vocals and you'll be much happier with the final mix. It's a great idea to take information and techniques from multiple sources and experiment to find out what works best for the music and the equipment that you have access to at the moment.
Microphones are a major factor when you're recording vocals. Not all microphones are created equal and they certainly all won't give you the same sound. The price of a microphone isn't a concern that you should worry about when searching for the right mic for your vocal tracks. Focus on a mic that will give you what you're looking to track as a solid base for your vocals. If you're looking for clean and crisp vocals, try to find a mic that has a flat frequency response or one that at least has a smooth response in the range of the vocalist. Some mics are specifically tailored for vocals and they typically do a great job. If you have the ability to audition mics before you purchase them, I'd highly recommend that route.
Now for the first tip / secret that I use to get great sounding vocals. Placement of the mic is by far the most important place to start. Move the vocalist around the mic to find the right spot for the amount of presence and clarity. Don't just have the vocalist stand right in front of the mic. Many times, vocalists will stand too close to a mic. This causes too much presence in the low frequencies and tends to pick up a lot of sibilance. A pop filter placed right in front of the mic won't alleviate this problem. But it is a good idea to use a pop filter to guide the vocalist to the proper distance from the capsule of the mic. There's not a specific amount of space that you can use on each vocalist, you have to work with how loud and what type of tone the vocalist has for each individual track. That's why they have a goose neck for being placed in different places depending on the vocalist. Plus, it's a great idea to mount the pop filter on a separate mic stand. This allows you to move the mic around while maintaining the spot where the vocalist stands. Keep in mind that the vocalist doesn't have to be on axis with the capsule of the microphone. It's quite alright to experiment with having the vocalist sing off to the side of the mic. This technique may reduce the amount presence and help the vocal fit right into the mix.
I hope this information helps you get started with tracking amazing vocals. The vocalist can be the most amazing singer in the world, but how they're recorded is half of the quality. So work with your vocalists and talk to them if you're hearing something that doesn't sound good. It's perfectly normal to have a vocalist do another take if there are problems with the recording. Never fall back on the notion that it can be fixed in the mix. Strive to be the best engineer you can be and do everything you can to get solid vocal tracks. Less is more and this goes a long way when you start to mix and the vocals already sound perfect. A few tweaks here and there and you should be able to get the right sound for the mix. Please leave a comment if you have any questions about the techniques that I've listed here.
Turn your speakers up, not your meters
If I had a nickel for every time I had to turn down levels on the tracks I receive when I'm doing a mixing session, I'd be a millionaire. If you want to hear what your mix sounds like at a louder volume, try turning up the volume on your monitors first. Don't push the faders all the way up or use a compressor/limiter, you're only doing damage to your mix.

Set up a reference track! Just import your favorite song into your DAW session and listen to it through the monitors. You have an idea what that song sounds like so you can use it as a reference point to calibrate your system and get a good point of reference for your mix. Mixing without a reference track is like driving a car blindfolded. Not a good idea.
Most DAWs come with a metering plug-in or a metering software program. Use it! It's there for a reason. Metering helps you get a good idea of how loud your mix actually sounds. If your DAW doesn't show RMS levels, there are a bunch of programs out there that are free and will give you a good reference point for your RMS levels. Try and give each of your mixes at least 10dB of dynamic range. If possible, give your mix anywhere between 15dB to 20dB of dynamic range. You'll notice a huge difference in the audio quality of your mix if the dynamic range has lots of room to breathe.
Louder is not better if your mix has a bunch of digital distortion. If no one will listen to you music, it's probably not the content, but rather the lack of quality mixing that was put into the music. Take the time to give your music a real good listen. Critical monitoring is so important to making sure that you get a good mix. Don't over compress and don't smash your limiter or compressor so that your meters are all the way maxed out at 0 dBFS.
Black Lion Audio Signature Mod

Black Lion Audio Signature Mod 002r
Many clients have asked how we get such amazing audio quality and we're proud to say that it's a combination of mics, cables, and converters. At the heart of our drum and instrument recording is our modified Digi002rack. For many years, we were tracking with a Blue Face Digidesign 96 i/o on an ACCEL PCIe Core card. The recordings were good and we were very happy with the audio quality.
One day, a client came by the studio with a road case with a Digi002rack that had the Black Lion Audio Signature Mod. To be honest, I was slightly offended that a client wanted to track with the LE interface instead of our HD interface. We had a brief discussion about how each of us was impressed with the audio quality of our respectable interfaces and converters. At the end of the discussion, we decided to have a shootout with the interfaces and compare them side-by-side to hear if there was any obvious difference.
The band's drummer played a simple rock groove for about 60 seconds with a nice array of tom fills and cymbal compliments. We tracked the performance with both interfaces one after another using the same mics & cables, the only variable was the interface. We bounced the tracks down to a stereo wav file and then burned a CD with both tracks. We popped the CD into the CD player and put it on random. Then we listened to the two tracks. Instantly after listening to the first track, the second track kicked in and so did the detail. It was stunning how clear and accurate the tone and shape of the drum sounds were in track 2 over track 1. The kick had sharp punch and deep boom. The snare had crisp pop and resonating decay. The cymbals were vibrant, but not too brittle.
I was sure that track 2 was the 96 i/o. Oh the wave of shock that rippled through my mind when I saw that track 2 was the BLA mod. A system that cost 1/3 of the expensive HD system had just out shined what I thought was the holy grail of audio interfaces. Needless to say, I was able to purchase a new 002r from the local Pro Audio retailer for $300 on closeout cause they were starting to stock the new 003r units. So for less than $2,000, I was able to purchase a new 002r unit and ship it off to Black Lion Audio in Chicago for their premium Signature Mod.
Now the studio has been tracking with the BLA 002r for the past 5 years and clients have been impressed with the audio quality. It is one of those things you have to hear to believe and we're happy to invite clients to come by the studio and hear some of the recent projects we've produced.
As amazing as the BLA 002r is for instruments, it does fall just short of the new AVID HD interfaces. We picked up a OMNI interface with the HD Native Core card and the vocal tracks from this interface are impressive. With the combination of our BLA 002r and the HD OMNI, it's a perfect combination of music and vocals for any project.

Vocal EQ mixing secret: High & Low Pass Filters
Good vocals always need to sit perfectly in the mix. Here's some insight from Engineer David Hughes on producing and mixing vocals.
EQ can be the most elusive part of mixing. Presets are a good starting point, but 99% of the time they don't get the job done. You've got to know all the parameters of your EQ. HP & LP filters usually go overlooked when it comes to EQ. However, these can be some of the most critical tools you use. Extreme high and low frequencies can cause a lot of congestion in a mix. Take the time to use filters and roll off some of the high and low frequencies on each track in your mix. By sculpting your tracks with HP and LP filters, you will find that your tracks fit together sonically.

In addition to the filters, you can use the Maag EQ4 on your vocal tracks and get out-of-this-world results with a simple turn of the knob. The EQ4 has the "Air Band" built on the top end of the EQ and allows you to dial in the right amount of shine and shimmer in a vocal track. This allows it to open up and sit perfectly on top of the mix. At the moment, the EQ4 is only sold as a 500 series module, so you'll need to do a little investing in your studio to add this magical piece of gear. Trust me when I say that you will not be disappointed. There have been so many times when I just give the 40KHz a 3dB boost and all of a sudden the vocals come to life. And yes, I did say 40KHz. You just have to hear it to believe it. The rest of this EQ is also excellent on almost any track. The SUB knob also works as a filter and allows you to carve out any low frequencies that may get too boomy or muddy in your mix. This is the magical box!
Now in vocal tracks, there's not a lot of detail or useful information in the low frequencies. Use the filter to roll off the low end up to about 100 Hz. Don't stop there, move the curve up until you find the right amount of low end reduction to help the vocal sit in the mix. Use a gentle curve to make sure you don't get any phasing problems. A 6dB or 12dB curve will work best for this sort of filtering. A steeper curve will usually cause phase shift and this will result in the vocals going out of phase with the mix.
Be sure not to do this with the track in solo mode. You need to mix your vocal in the mix. The world is not going to hear your vocal tracks in solo mode, so don't mix them that way. You can solo the track to A/B the mix against your vocals, but ultimately you should make decisions while listening to the vocal in the mix.
Hope this is helpful in getting you going with your vocal recordings. Please leave a comment if you have a question. For more info and video tutorials on audio production, please check out my audio mixing master class on Udemy.

AVID HD OMNI
APOGEE ROSETTA 800 w/ XHD option
Shine On Studios is proud to announce the addition of the AVID HD OMNI system to our studio. This top-of-the-line HD interface for Pro Tools HD offers pristine A/D & D/A conversion with two high-end mic pre-amps. Paired with our Apogee Rosetta i/o, we now offer 8 additional channels of HD recording!
The studio is sounding better than ever. Tracks are clean and punchy! The clarity is amazing and Pro Tools 10HD offers our engineers so many ways to enhance and mix tracks. Everything from Elastic Audio to extremely low latency, gives every track produced at the studio that professional touch that makes them shine!