
Music reviews
&
helpful information about recording and mixing techniques. Posts written by professional engineers and musicians.
Learn about the inside secrets that engineers at Shine On Studio use in their sessions. Become a mixmaster and impress the world with your knowledge of audio production.
Colored vinyl vs. Black Vinyl
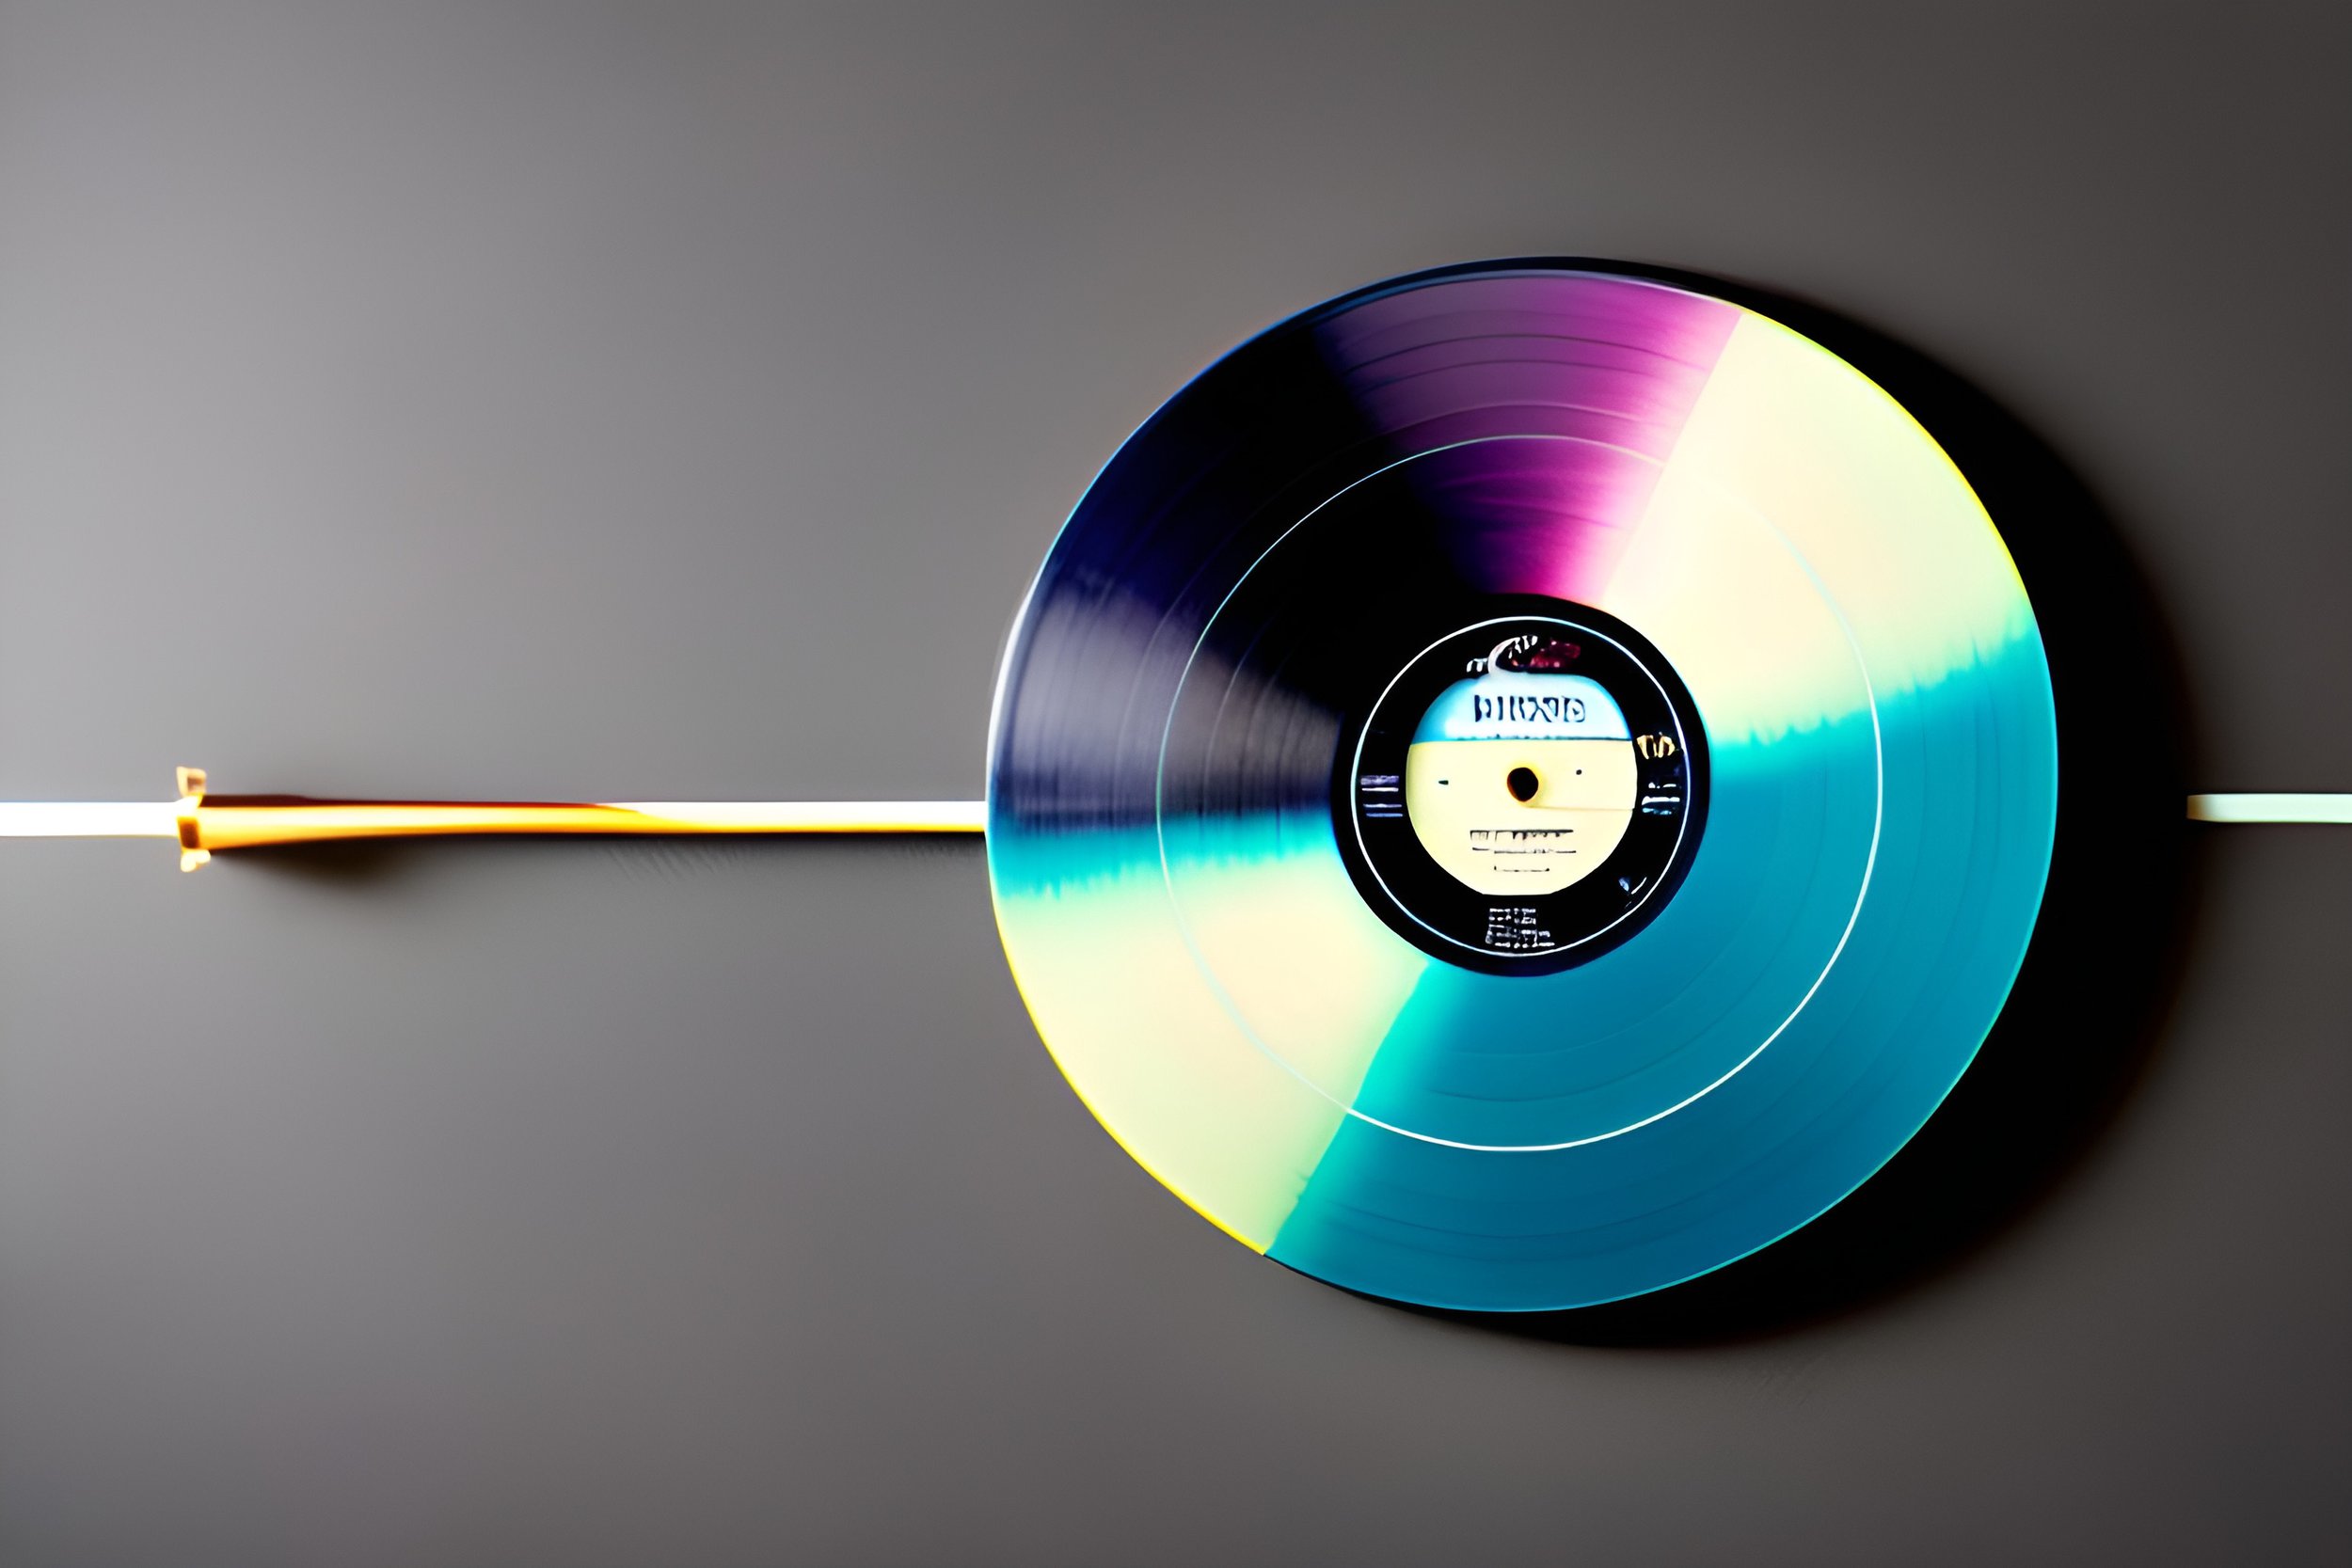
We’ve had a few questions recently about the quality of audio on colored vinyl. Mainly, if the audio quality on colored vinyl is inferior to the audio quality on black vinyl. Even though there are some differences in the process of making colored vinyl, mainly dyes, there really isn’t a big difference in the modern production of vinyl records.
The vinyl resurgence has been one that many people have embraced. With this resurgence, the music industry has seen an increase in demand for vinyl records. This has spawned, a bigger demand for colored vinyl. Being different from the standard black vinyl, now you can have colored vinyl that is swirls or splatters and even pictures. The process of making colored vinyl has improved over the years and now you probably wouldn’t notice a big difference in the sound quality between colored and black vinyl.
So take your pick and choose the vinyl color that makes you happy. In some cases, the colored vinyl is a limited release, and could possibly increase in value over time. However, if you’re buying it for your own listening enjoyment, it really doesn’t matter. So rest assured That your audio will be of the highest quality that vinyl can provide regardless of the color.
M1 compatibility with 3rd party plugins
Developers are still working out the kinks with the Apple M1 chips, but things are starting to look up. This past month I’ve received quite a few newsletter updates from plugin companies that say their plugins are now M1 compatible. This is all good news, yet Apple just announced they are testing the M2 chip!
So you’re asking yourself, “Do I wait to upgrade?” I don’t think you have to wait. There will always be compatibility issues of some nature and audio production software. What you should do, is create a workstation and a workflow that is optimized for getting your work done. Now does that mean you go out and buy a brand new computer? That’s really up to you. The question you should really ask yourself is, “Does the workstation and workflow I currently have work for me now?” If the answer is yes, then I say you stick with it. Spending money that you don’t need to isn’t really the best business model. I know it seems exciting to have the newest and greatest equipment and software. However, there’s a lot to be said about being comfortable and efficient with your workflow. You probably already have that with the current set up you’re using.
developers are always going to be trying to keep up with the operating systems. This means that they’re going to develop updates at work with the new systems. You don’t have to update your software to the latest version. If it’s working now, just leave it be. In my experience, when you update just one plug-in it can cause some serious problems with your system. So if you want to upgrade to the new M1 system, plan to spend some cash to update all your software.
if you’re gonna do that, I would suggest that you take some time and figure out how much money it’s going to cost. And then determine whether or not that’s money well spent or could you use that money to do something more exciting like take a vacation. My main point is this: there will always be an endless stream of updates. Choose what works for you and stick with it for awhile.
$600 Plugins for Free!
Plugin Alliance has teamed up with Native Instruments and iZotope to create a new super group of audio software called Soundwide. For a limited time they are offering over $600 worth of their high quality plugins for free! Don’t hesitate. Go sign up now and grab this incredible offer while you can.
Best Hard Drive for Audio Production
I’ve used many hard drives for audio production. What I look for is speed and transfer times. I came across this Seagate 8TB external drive designed for the XBox. It’s fast, quiet, and very reliable. https://amzn.to/3HPqYDw
I’m able to run Pro Tools smoothly on this drive and don’t experience any lag time. At this price point, the value is extremely good. Plus, the two additional USB ports on the front come in real handy. I’ve got my iLok in one and that leaves the other to connect my phone or additional drives. I highly recommend this drive.
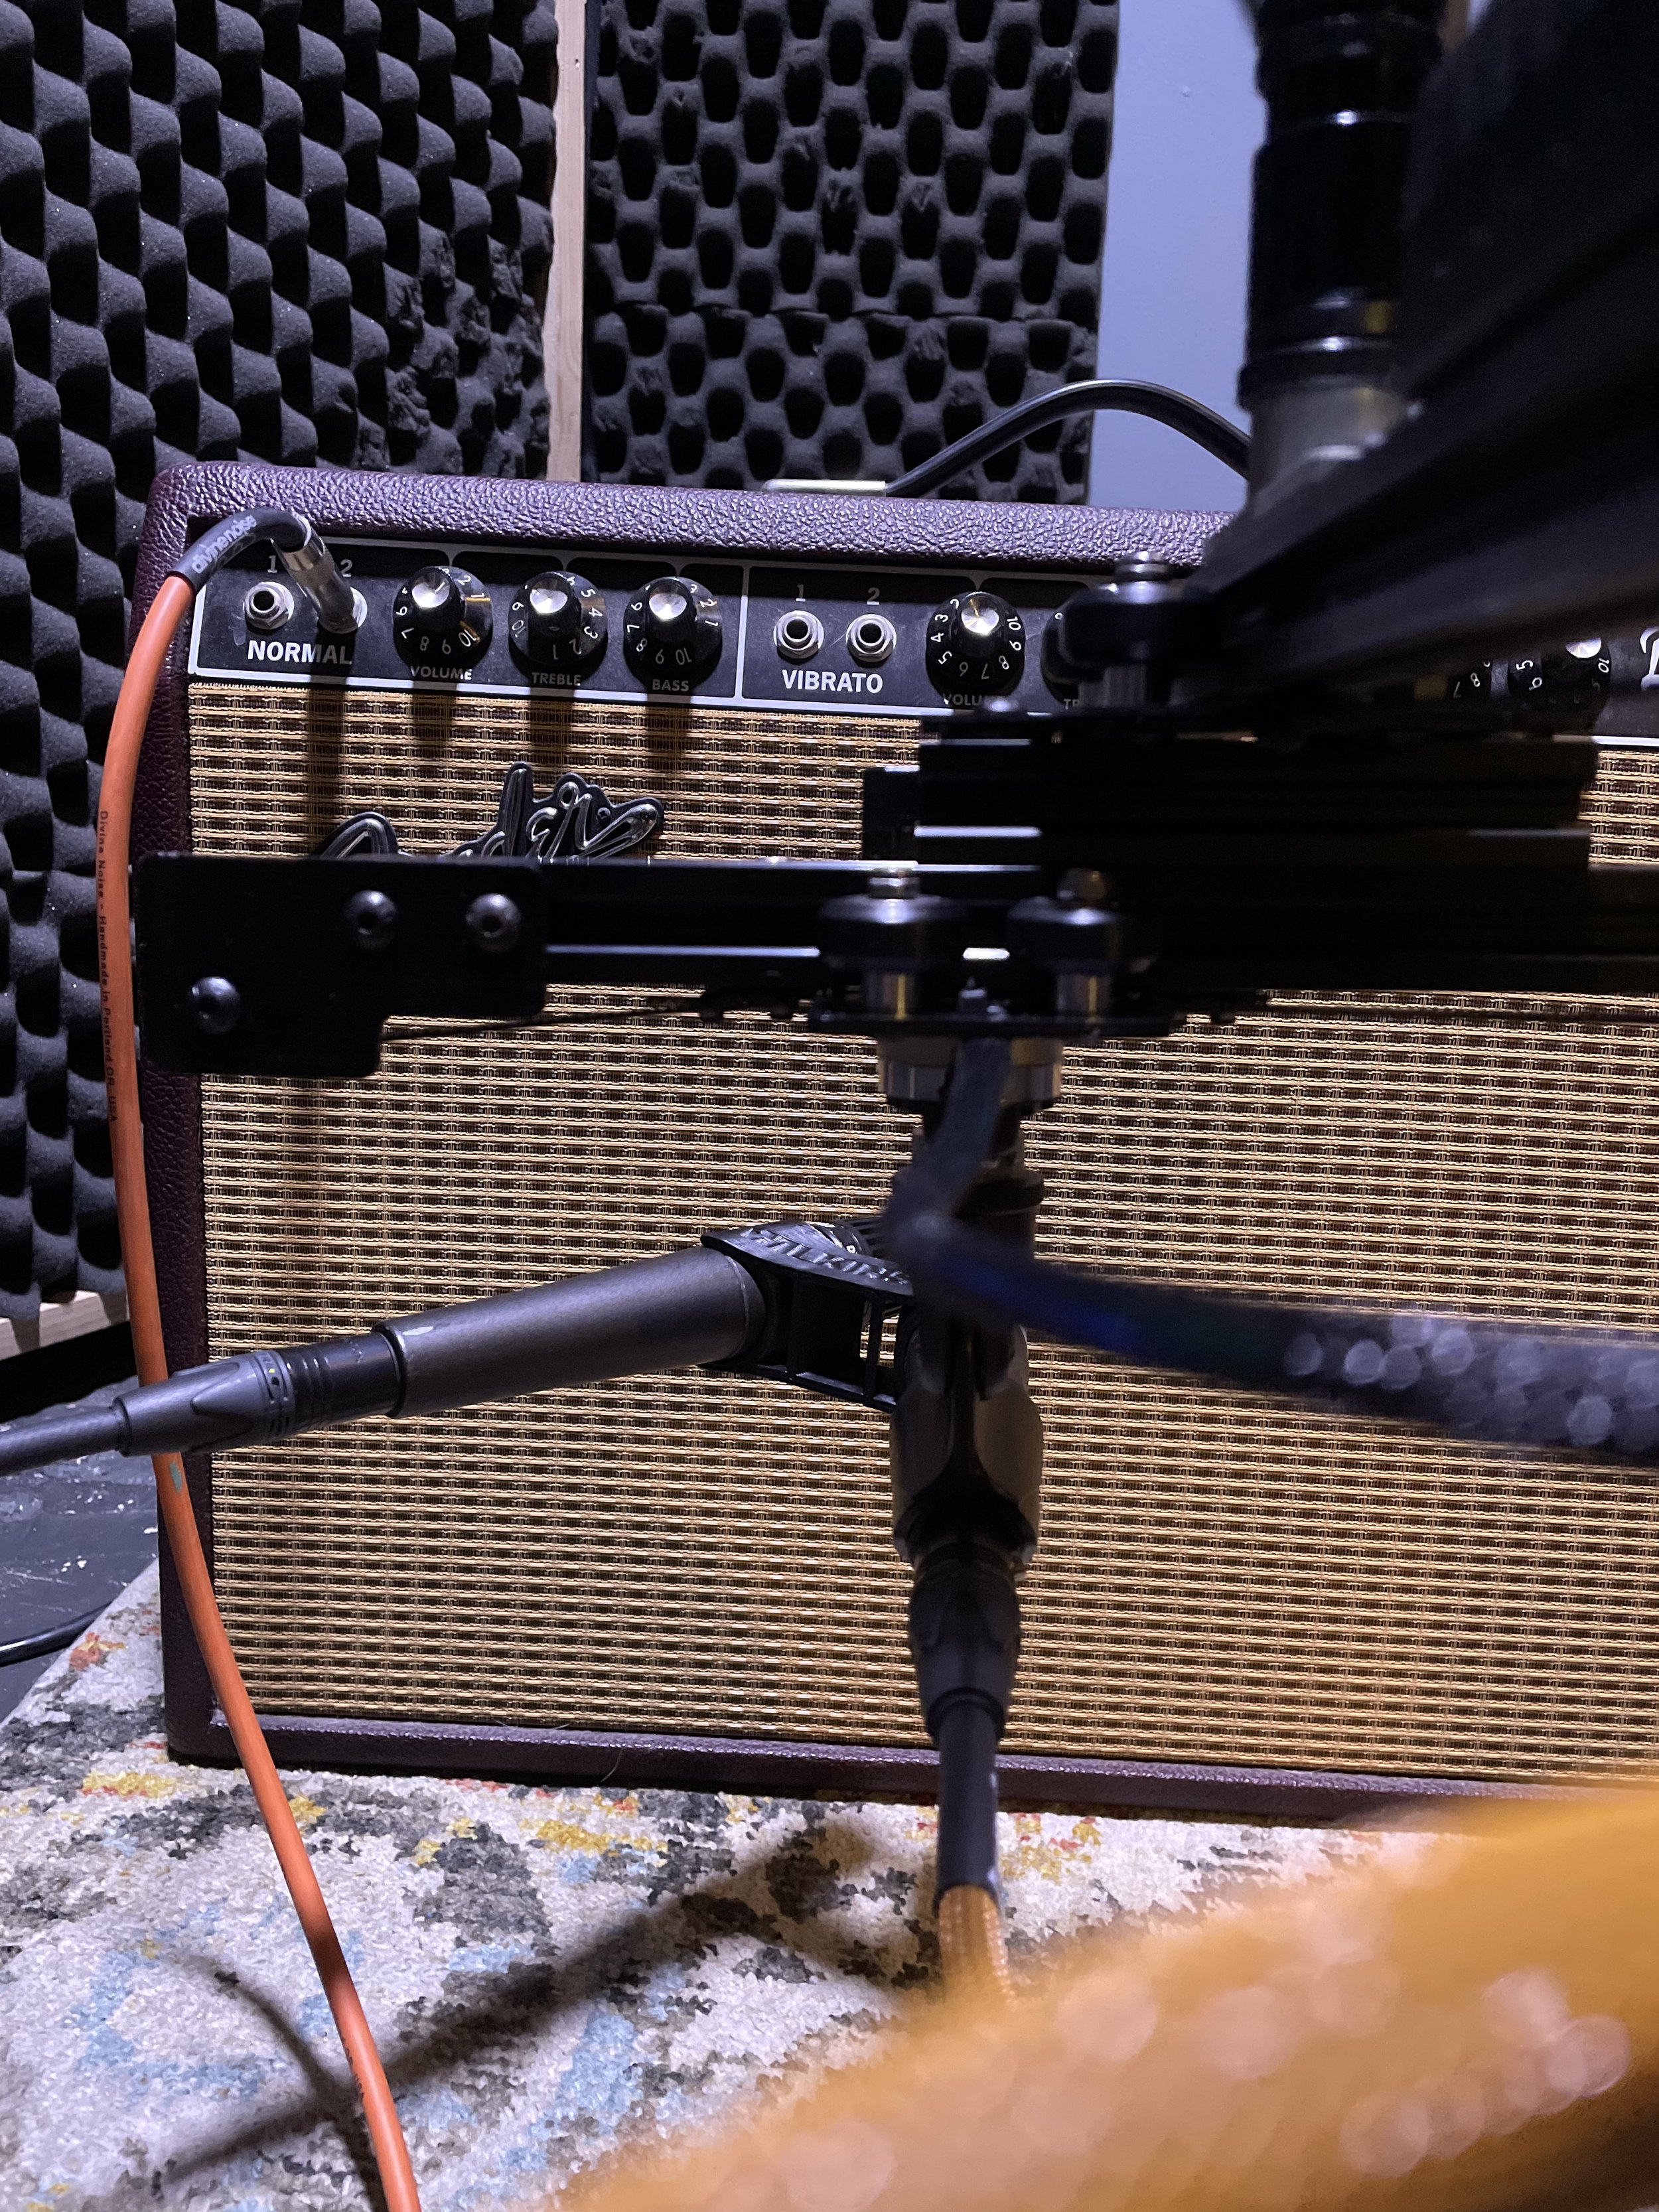
How to mic up a guitar amp
Miking up a guitar amp can present some difficult obstacles for you. Here are a few pointers that help you out with your next recording session with guitar amps.
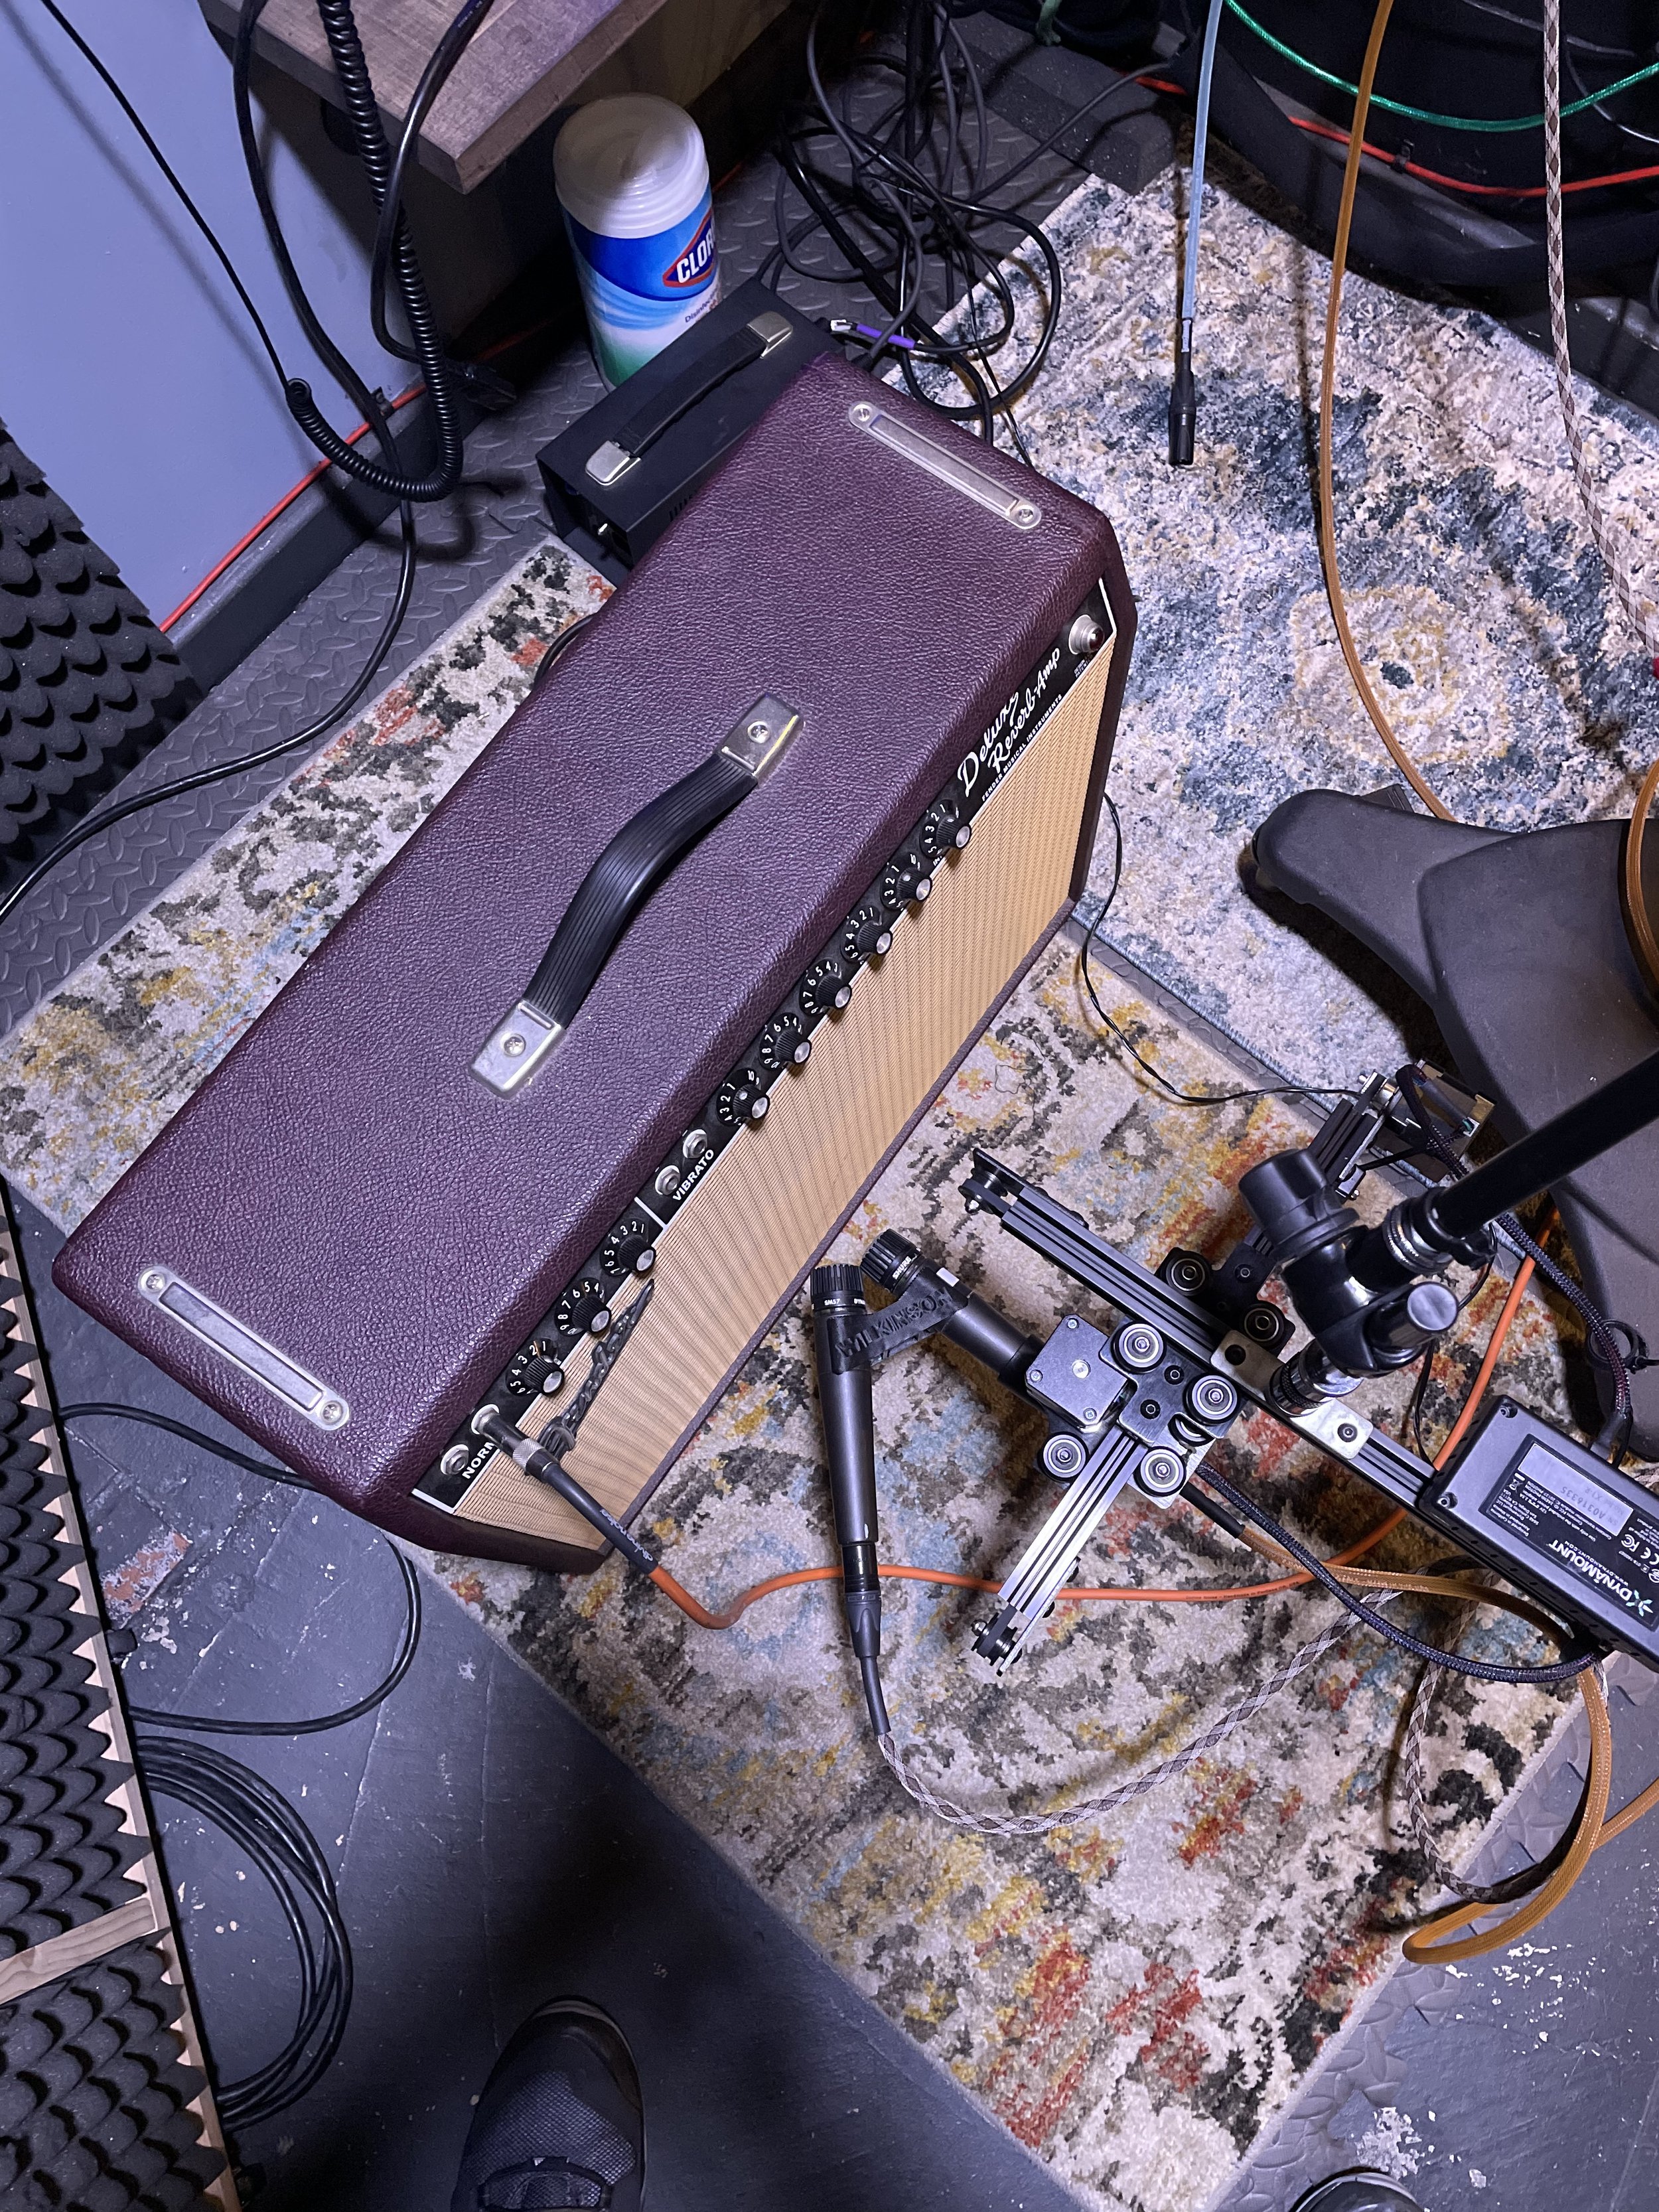
Getting the right tone out of your guitar amp recordings can be a bit of a headache sometimes. Probably the most common microphone used to record guitar amps is the Shure SM 57. Most engineers also like to use more than one mic on guitar amps so they have the ability to blend or choose a different tone. Let me share a few tips I’ve learned over the years to help you get the most out of your amp recordings.
Which ever mic you decide to use for your recording, the biggest impact on your tone is going to be where you decide to place the microphone. If your amp only has one cone, you don’t have to worry too much about choosing which cone sounds the best. If your amp has more than one cone, you have some options. First option is to put a mic on each cone. This can give you choices to blend or single out a particular cone. The second option is to pair some mics together on the same cone and get a blended tone from just one cone. Try out a few combinations until you get the sound you’re after. Please leave any comments if you’d like to discuss further.
Free Plugins for your DAW
Here are some good options of free plugins for your DAW.
Most companies have some version of free plugins that can be used in many of the mainstream DAWs. However, this time of year, there are some hidden gems that pop up for you to score. Here are a few I’ve found for you to enjoy.
This is one of my favorite plugins for grit and distortion. Works well for almost any audio signal. With built in filters and delay, you’ll soon see why this plugin winds up on so many mixes.
The Frontier limiter is a simple plugin that gets a lot done. Placing this on individual tracks can allow you to trim peaks and even out a track that is too dynamic. It also works really well as the last plugin on your master buss.
Tape MELLO-FI is an easy-to-use effect plugin that brings instant chill atmosphere and vintage tape-aged warmth in a few clicks. Kick back and sprinkle sublime lo-fi vibes over your drum loops, vocals, mix bus, and anything in between. It’s free until 12/31/21, so go pick it up ASAP.
A creative filter plugin that can give your mix a unique edge. It’s not always the clarity that makes a mix interesting. Sometimes you need to chop it up and give it some movement. Check out this little fellow and experiment with your mixing.


External Hard Drives for Audio Production Recording & Mixing
Here are some SSD Hard Drive options for storing and backing up your Audio Production work. These drives work great with Ableton, Logic Pro, Pro Tools, Studio One and many other DAWs.
There are a lot of hard drive options out there and as technology advances, the options keep getting better and better. The main thing to consider is the transfer rate that will send information back and forth to your computer. Most DAWs require a drive that rotates at a minimum 7200 rpm for audio. Of all the dries that the studio has used over the years. Glyph has been the one that outshines them all. We started with those Glyph Key hot-swappable drives that were easy to move from studio to home and be able to take our work with us to keep ahead of deadlines. Now everything is much more streamlined. The Blackbox series from Glyph has been rock solid for us over the past few years. The rotating drives offer a lot of storage for a very reasonable price. You can snag up to 10TB for under $330. That’s a lot of storage space! The 2TB option is listed here and is a great starting point for any engineer.
If you want to up your game a bit, you should look at Solid State Drives. These rugged drives do not have a rotating disc, but instead have flash memory that can be recalled instantly. The price point on these SSD drives is a bit more because of the new technology, but they are worth every penny. This 1TB model is very slim and slender and travels quite well. We have one that goes with the mobile recording setup and it has performed admirably. Priced at $199.95, this drive is affordable for the amount of time you will save on your workflow. If you need to move your setup on a regular basis, I would suggest that you consider the SSD version. You will have a rugged drive that can take a few bangs and jolts and keep performing at the level any professional demands.

Good Mics for Podcasting
Thinking about starting a podcast? Here are some affordable mic options that will get you up and running right away.
Starting a podcast is a great idea now that we’re all stuck at home for the foreseeable future. You probably have an idea of what you want to talk about, so I’ll just cut to the info on microphones. There are a lot of options and some are affordable and some are outrageously expensive. Let me share with you some of the options that I have successfully used and been pleased with the results.
FIFINE Studio Mic Bundle
If you’re on a tight budget, the FIFINE Studio package is what you need. This bundle has a decent mic that will give you sound that is suitable for any podcast situation. The scissor arm and shock mount will allow you to position the mic for easy use and comfort if you’re tracking a lot and don’t want to be hunched over for a desktop mic. The pop filter will help you tame any rouge plosives that may happen as you talk. This will also help keep the mic clean. The 8’2” USB cable should be long enough for yo to position the mic any way that you like. Plus at $59.99, this bundle is affordable and provides you with a great setup for your new podcast endeavors.
SHURE MV51
This mic is great for more than just podcasting. However, I think it is best suited for podcasting based on the audio quality provided and the way that it connects to your devices. The USB connection on this mic offers options for connecting to a laptop or an iOS device. The MV51 is a bit more versatile and has a really cool look. The controls on the front of the MV51 make it really easy to adjust volume levels and mute the mic when you want to cut the feed. If you’re going to be doing a lot of podcasting, you might as well do it in style. The headphone output on this mic makes it really easy to connect and get going in a snap.
RODE PODCASTER
The Rode Podcaster is one of my favorites. It’s powered by USB and has a headphone output right on the mic. This package from Amazon includes a shockmount and boom arm to make your podcasting experience smooth and professional. Not much else to say about this mic because it acts as your interface and provides you with quality audio ideal for your podcast. Now if you have a newer computer with the USB-C connection, you’ll need to get an adapter for this mic. Not to worry, I’ve got a link for that adapter right here.
Rode NT USB Mini
This mic is a great option for a desktop mic that offers you all the necessities of a Podcast mic. This lil’ guy pack a big punch in a small frame. The USB connection on the mic is USB-C. Great for all the new laptops. The cable in the box is a USB-C to USB-A connection. So this will work with all the older laptops or desktops, too. The volume control on the front is easy to manage and this mic is really a great option for anyone on the go since it has a stand and is small enough to fit in any laptop bag. Just plug in your headphones and you’re all set to start tracking out your next podcast episode.
These are just a few options that I’m suggesting. There are many more possibilities. Be sure to budget for what you need and feel free to leave any questions or comments and I’ll get back to you ASAP.

New Single: "In and Out"
New Music from Krafty. Check out his new tune “In and Out”
Krafty has just released his new single, “In and Out” from his upcoming EP. Featuring the stunning vocalist Anjali Asha & Misso. This track shows off the lyrical power that you can expect from the EP set to be released later in 2020.
Krafty has been working hard on this album at the studio. He is a world-class gentleman and one of the friendliest guys I’ve ever met. This just makes the process even better when we’re in the studio. We’ve been spending time tracking and mixing this album to perfection. Things have been coming together harmoniously and that makes the magic contained in this album.
This song is a just a small sample of the audio that this album is going to bring to the world. An album of this caliber is going to make a big impact on the music industry. Krafty is on the precipice of his career and the future is looking very bright for this artist.

The Black Friday Blackhole of Deals
There are a lot of good deals out there this year. I’ve found a few that are great options for almost any studio setup. Open up this blog post to see details and links to these deals.
As the biggest shopping day is now upon us, I urge all students to take caution in what you purchase. Your studio and software toolbox is going to continue to grow and it should. Just keep in mind that you shouldn't spend your entire bank account on gear that you may not use right away. It's good to build up your studio over time and get familiar with what you add to your studio so that you can be efficient with your tools. It's a good idea to take the time to learn what you have in your studio and become a wizard using your tools.
Tell me what you're looking to buy. I'm always interested in what has your attention right now and what you think will improve your workflow and overall production.
Here are some really affordable options that I would recommend that will not break the bank and add some very useful tools to your studio.
PSP is one of the plugin companies that may not be familiar to you, but they have some great plugins. The NEX reverb and the HertzRider are currently on sale for $20.
The new releases from iZotope are tools that will improve any workflow.
Flux Pure Limiter is on sale for $39 and is a great limiter to use on individual tracks and your master bus.
Looking for some great video editing software that is affordable? Check out FILMORA from Wondershare.
Sonnox is offering 50% off most of their software. Now is a great time to go grab that Inflator plugin.
Plugin Boutique is offering some great deals + iZotope Nectar Elements for free with any purchase.
I'm sure you will get some great deals this weekend. Just be sure you have some cash left in your pocket to pay the bills.
Gain Staging
Advice on how to make good use of the meters in your DAW and learn how to properly read them.
Getting the right levels in your mix is the very first part of the recording process. Paying attention to your input levels can pay dividends when it comes to the mixing process. Proper levels will yield a much more streamlined workflow when it comes to sitting down to mix.
So you maybe asking yourself, “What are the proper levels that I should be trying to achieve?“
The answer to this question can vary. You have to have a vision for the end result. If you don’t have that vision, then you should focus on getting levels that optimize your A/D converters. Most interfaces are calibrated for a sweet spot around -20dBFS to -16dBFS. Hitting this area as your target RMS level will almost always give you ideal tracks to mix.
Now if you’re sitting there scratching your head and not quite sure what all that means, don’t worry. Here’s a good rule of thumb to follow. Most meters in DAWs have a color coded display. Typically green is at the bottom followed by yellow, orange, and red. If you get your average level to hover right around where the green and yellow meet, then you’re in the ballpark. This means the middle point between your peak levels and your noise floor is close to that point where the meter changes colors.
Now of course it depends on what you’re recording. Different types of sound sources are going to give you different levels. Drums are going to have very sharp attacks that will yield higher peaks. Where as a vocal that isn’t too dynamic may just hover in the same area with little movement. One of the biggest problems that I see other engineers make is the level of their monitoring. Having your monitors up too loud or down to quiet will not truly give you a representation of the signal level. This is why you have to trust the meters and your DAW and let them show you what is actually happening with you levels. These are just pretty lights for you to look at while you’re working on your tracks. These are useful tools that can mean the difference between a good or bad mix.
It’s always a good idea to leave yourself some headroom when you’re tracking. You will want to have some space to mix and that is virtually impossible when your input levels hit -3dBFS or higher. Just be reasonable when you set your levels and keep in mind that you will be blending multiple tracks to mix down to your final print track.
Should You Be Mixing On BlueTooth Wireless Speakers?
If you’re checking your mixes on your car stereo system, you should also consider checking how bluetooth speakers reproduce your mix. Find out more about the speakers and which ones we recommend.
You probably have an Amazon Echo or Google Home wireless speaker in your house. Almost everyone has a BlueTooth wireless speaker and they are only going to become more popular. The portability of these small sound systems is going to start setting new standards for music production. Now that music lovers can take music with them anywhere they go, you’ll have to consider what your mixes sound like on these little sound systems. So Yes, you will need to start using these little monsters as part of your post-production workflow.
One of the ways you can start to incorporate these speakers into your workflow is to mix down an MP3 of your track and load it up on your smartphone. You could also put it on a streaming platform that allows you to keep the track private. Either way, you want to try and recreate how others will potentially listen to your music once it is publicly released.
You’ll need to check levels and listen to how the compression reacts to the small speakers. I just listened to a few major award-winning tracks on 2 of my wireless systems. When the bass line came in on both of them, the sound got swallowed and started pumping the cones. It didn’t sound very good and I actually removed the songs from my playlists. Now these songs may sound good on a larger system, but they didn't not make the cut for the smaller wireless systems. This is a big deal! If your mixes do not translate well to these little bundles of joy, you’ll find yourself looking for another job. That doesn’t sound like a lot of fun, so let’s look a few of the options that you can consider.
ANKER SOUNDCORE 2
I’ve had Anker Soundcore speakers around my home for a few years. They seem to last a long time on a single charge, so they’re good to have anywhere in the house or even in the backyard. You can now buy the new version and pair a few of them to a single source. This is good if you want to have sources to monitor in different parts of your home or studio.
They come in black, red, and blue. So you can pick a color that works with your studio decor. Right now there is a $5 coupon on almost every wireless speaker, so don’t wait and buy one today.
AMAZON ECHO
The wireless speaker system that is projected to be in every home in the USA by the year 2025. If you don’t already own one, it might be time for you to pony up and get one. To be honest, you could have more than one Bluetooth speaker in your studio to check your mixes. This line of devices will be the most common and probably should be one of the options you choose to use. I don’t recommend the little Echo Dot. Yet, it is popular, so maybe you do want one to use for reference. The nice thing about this line is that is has a SUB! For those of you that love bass, this may be a good option to check out.
New studio membership benefits
In-Studio Training is now a new feature for all our studio membership programs. Get professional assistance with every aspect of your musical career.

The studio membership program has been quite successful and has helped musicians get the assistance they need to complete their recordings and distribute their music to the world. Part of the new studio membership is the in-studio musician training that will give all studio members access to our staff to get assistance with every aspect of their musical career. This will include professional feedback for everything from composing songs to stage performance. The goal is to provide constructive feedback that will help musicians make critical decisions about their public appearance. Not just online, but in-person, which will help develop stronger relationships with managers, bookers, promoters, and most importantly the fans.
We have 2 options for studio membership right now and may add more in the future. Both options for membership come with our in-studio training. Paired with our online services, each member has access to our services wherever they are for any occasion. So if you have plans to work on music videos or start to plan your upcoming tour, we are here to assist you with every step of the process.
NAMM 2019
Some thought and highlights from the 2019 NAMM convention in Anaheim, CA.
It was another great year attending the NAMM convention in Anaheim. This year I focused on making some new connections and getting to know more about the industry. I met many talented musicians and innovative thinkers. Yet, the information available was what really refueled my passion for recording and mixing.

Tony Maserati - NAMM 2019
I heard some great lectures by Tony Maserati, Fab DuPont, and Jacquire King, just to name a few. Taking mixes and letting them take on a life of their own seemed to be the universal theme from many of these talented engineers. Using parallel aux tracks to blend layers of textures was a reassuring message since that is how I do many of my layering techniques. What I found the most interesting was how each of these pros set up their EQ and compression chains. Seeing and hearing how they shaped sound has really opened my thinking about how to approach a mix.
I’m going to be spending a lot of my free time to practice some of these techniques and start developing some new signal chains. This will create a new sound for all of my mixes that will benefit every client at the studio.
Among the many things to see, experience, and hear at the NAMM convention, I also spent some time listening to the educational talks that where happening at NAMM U. I’d love to share some of the ideas and techniques that were discussed at these lectures. Set ups some time to come by the studio and we can engage in a discussion that will definitely help you get a better understanding of the music industry and how it can be integrated into your marketing and social networks.
High and Low Pass Filters on Vocals
EQ settings for vocals sometimes feels like you’re trying to find buried treasure. An endless task of moving knobs and listening to the changes just seems overwhelming. Then comes the conversation about filters on vocals that almost always arises in every session.
EQ settings for vocals sometimes feels like you’re trying to find buried treasure. An endless task of moving knobs and listening to the changes just seems overwhelming. Then comes the conversation about filters on vocals that almost always arises in every session.
There are a few things you can do to improve your vocal recordings and get them to sit in a mix. The first is using filters on your EQ to tighten up the high and low end spectrum. Filters on most EQ plugins have 3 main settings.
On/Off
Frequency
Curve/Slope
The first is obvious, so moving on to the second. Frequency is the point where the filter starts to engage. This is the point in the EQ spectrum where the audio is starting to be lowered or attenuated. On a High-Pass Filter (HPF) you are allowing the high frequencies to pass as you filter out the low frequencies. On a Low-Pass Filter (LPF) you are allowing the low frequencies to pass as you filter out the high frequencies. When these are used properly, you can clean up a recording to focus on the audio spectrum that you do want in the mix.

Brainworx bx_hybrid V2
For example, when you set your HPF to 50Hz it is only starting to attenuate the frequencies at that point. How much attenuation is based on the third parameter, the curve or slope. This is measured in dB octaves that are listed as 6dB, 12dB, 18dB, 24dB, and 30dB. These are referred to as ordered harmonics and a 6dB curve is a 1st order harmonic. This means that the signal level drops 6dB per octave. A second order harmonic is a 12dB slope and the signal drops 12dB per octave. The higher the slope the more severe the drop in audio signal becomes and approaches a “brick-wall” response, which is not usually favorable to your audio signal.
For vocals I like to use a 12dB slope for both the HPF and the LPF. Sometimes I’ll use a different setting if the mix needs some tweaking. For the HPF I typically start around 80Hz and then adjust the frequency based on the tone of the vocalist and the style of the music. It does take some time to train your ears to recognize the sound that you want for a mix. I don’t recommend making these changes with the track in solo mode. It’s better to have your track in the mix and listen to how the EQ adjustments affect your track and mix. Using a HPF correctly can help cut down on the rumble in a vocal track and tame some of the plosives that may happen if your vocalist is too close to the mic.
The LPF on vocals can be a bit more difficult to dial in. In many cases, the vocal spectrum in the high frequencies is OK to leave in the mix. If you’re trying to cut down on sibilance, it’s best to use a de-esser. However, if you want to shape the vocal to reduce the amount of high frequencies it has in the mix then you can use a LPF to get the job done. I’ll usually start around 10kHz with a 12dB slope and then sweep the filter frequency up and down to find a spot that works for the mix. Rolling off these high frequencies can make more room in a mix for other instruments or backing vocal tracks. Depending on the arrangement of the music you can get a tighter sound by filtering out these higher vocal frequencies.
For more info and visual tutorials, check out my audio mixing master class.

Working on the mix
Get some insight on how the pros prepare for a mixing session.
Today's blog entry is just about getting yourself in the right mind frame for mixing. Focus is essential and that comes with proper rest. Your mind, body, and ears should be well-rested before starting on your mix. When you take fatigue out of the equation, your mix will have a sense of power and intensity.
Getting setup for a session at Shine On Studio
As you start your mix, it can be a good idea to align yourself to a reference track. Give your ears some time to adjust to a mix that has a similar energy. Absorb the sound from the reference track to put you on the right path for your own mix. This will map out the focus you need to start your mix.
I personally like to start mixing at a lower volume on my monitors. This allows me to challenge my ears and focus on the pieces of the music that need to be the foundation of the mix. These core elements are the source of energy that puts the music into motion. Once you have all of these elements in the right place, the rest of the mix can be layered with the accent sounds.
The mixing work you do may take some time. Give yourself the time needed to make wise decisions. You can change your mind about the mix and that is part of the journey. A good mix is one that has been given the proper amount of attention. It is OK to take breaks to restore your energy and get your focus back on track. You can take the time you need and sometimes what you need to do is step back for a while and review what you've done with the mix.
Procrastination and anxiety are not your friends. It's a good idea to keep them out of your routine when working on a mix. You do want to stay in contact with your client throughout the progress of your mix. If you're making reference copies to review, share them with your client for feedback. Sometimes they may like an aspect you are considering to revise. Remember that this is their music, so you want them to be pleased with the final decisions.
I hope these words encourage and guide you to be a good mix engineer. Just remember that it takes time to craft a masterpiece.
UAD vs. Native Plugins
Two options that could make a big difference in your workflow and your wallet. Let’s look at some of the main similarities and differences between the two platforms.
Everyone is in the plugin business these days. It’s the modern way to work on audio production that has embraced the digital world. With so many options for plugins, there are some things to consider before you blow your kid’s inheritance on software. First thing is what DAW to choose and that should also go with what plugins are included with that DAW. Most of the DAWs out on the market all come with a decent set of stock plugins. So you have to consider if those stock plugins will be sufficient to get you going and give you the tools you need to start mixing the way you want. Now if you feel that you need to add to your toolbox and get some additional plugins to fine tune your mixing there are a few things to keep in mind. All the plugin companies have formats that should be compatible with most of the big DAWs, so you have quite a few options.
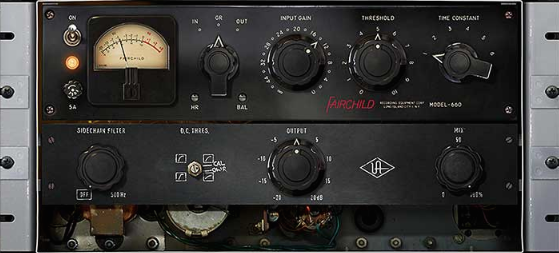
UAD Fairchild Compressor
Focus on plugs that give you something that you don’t already have in your system. Mainly a new tool that will enhance your mixes and give you the control you need to shape the mix. Compressors are bountiful and there are many different types out on the market. What do you need that you don’t already have? More color? Better transient control? The best way to find out is demo a few plugins and see if they give you the edge that you need. Most of the plugin companies will offer a trial period, which is exactly what you should do before investing. Even if you watch a video or someone tells you that you should buy a plugin, I always recommend running it through the trial period to give yourself some time to find out if it’s what you need.
Most companies offer native plugins. These are plugins that work with the DSP processing power of your computer. They’re great because you don’t need any extra hardware to run them. The only limitation is the processing power of your computer. One of my favorite native plugin companies is Plugin Alliance. These plugins are modeled emulations of some great pieces of gear and they sound great. The audio quality is clear and gives you the sound that your mixes need.
Now if your computer doesn’t have the power to run these native plugins, you can look into getting a UAD system that provides the DSP processing for your plugins. Universal Audio has a line of interfaces and satellite boxes that allow you to run the UAD plugins. The Apollo system has many options and price points and this makes them a good option for any studio setup.
You can get the same plugin on both UAD and Native platforms. So do you need to have both versions? I’d only say yes if you need to delegate your DSP processing. I’ve used both platforms and I don’t notice any big differences between the sound. I’ve done null tests on the plugins and they cancel out when the phase is inverted. The main difference is the way the plugins run on the system and the price. UAD is a bit more expensive, but does free up the DSP on your computer for other plugins and processing.
I recently asked a question on the Plugin Alliance forum to find out how everyone felt about the differences between Native and UAD plugins. You can read the comments here.
If you have anything to add to this discussion, please leave a comment.
Prism Sound Titan
Prism Sound is a UK based company that offers some of the industries best audio interfaces. The Titan is the most affordable for the features that are offered.
I’ve added a new flagship interface to the studio to add more clarity and depth to our production. I met Frank Oglethorpe at an event in San Francisco and got to hear the Atlas & Titan in action. The audio detail was giving me chills and put me in a space where the music was visual.
The Titan was in a small studio room that had treatment on the walls. It was an ideal situation to test out the ability of the DA and hear some recent mixes I’d just finished vs. mixes at the hosting studio. There was a difference in the low end where the frequencies had more depth without the mud. I immediately knew I had to demo a unit at my studio to hear if the mixes benefited from the converters in the Titan.

Engineer David Hughes at Shine On Studio.
I connected with Jeff Briss from Cutting Edge Audio and got the approval from Frank to demo a Titan. When it arrived, I wasted no time connecting it to the HDX system. The first mix I played came to life and filled the room with rich detail and precision clarity. My eyes got large and my ears were saturated with excitement. This was such an amazing experience that I knew a Titan was the missing piece for the studio.
I’ve had the Titan now for a few months and the response is exactly what I want to hear from my clients. Everyone loves the full sound and clarity that the audio has on every system they playback their music. This was a serious investment and it has already paid dividends that make it worth every penny.
I highly recommend Prism Sound and their audio interfaces. Send me a message and I’ll hook you up with info on how you can connect with the right people to demo a unit for yourself.

Mixing | Keyboards & Synthesizers
Keys and Synths are line level instruments that typically come directly into your console without amps being mic'd up. Let's discuss a little bit about running DI lines into your preamps or interfaces.
Keys and synths can appear to be an easy task to mix. They have dedicated outputs and don't require microphones. This very fact is what makes them difficult to tame sometimes. Their EQ spectrum can be all over the stereo field and this can make them unruly when it comes time to mix. My approach is to save the keys & synths for last. I like to mute them and address the drums, bass, guitars, & vocals first to get a nice even balance. Then the keys are like the icing on the cake. They layer a nice thick sound over the mix and it allows you to use surgical EQ to get the pockets filled to your taste. Keys are sometimes the glue that pulls a mix together and sometimes they cloud up the mix and make it murky.
Approaching keys with care can give you more control over the final balance of the mix. In some mixes, it would be a good idea to add some light delay on a 16th note. This can give the appearance of a wider sound for the keys in the mix.
Piano tracks typically benefit from proper EQ and a silky sounding reverb. The mood of the track will lead you to what style and depth of reverb to use. I love to hear a dark reverb with long tails, so I like to use a low pass filter on the reverb return. This allows the initial attack of the bright notes to shine with a very pleasing trail of dark tones following behind them.

Mixing Guitars | Solos
Guitar solos need to pop and stand out in a mix. They're the pinnacle or crescendo of a song in many cases, so they need to have that grand finnale attitude. Let's dive into a discussion about mixing guitar solos.
The guitar solo is the peak of the performance. The solo can catapult the song into the top spot on the charts. So let me take a moment to explain some techniques for mixing a good solo.
Solos usually come in towards the end of a song, so there is some build up to the solo. Rhythm guitars are laying the foundation for the solo to be built upon. Don't let the rhythm guitars steal any thunder from the solo guitar. Automate an EQ low pass filter to roll off some of the rhythm guitar's shimmer. This will open up space in the audio spectrum for the solo guitar to shine a bit more brightly.
Pan the solo guitar off to one side. If the vocalist is doing anything vocally over the solo, pan them to the opposite side. Try to isolate the solo guitar as much as possible to make it pop out of the mix. The panning and EQ can all be automated and this will allow a smooth transition in and out of the solo.
Adding a delay to the solo is a great way to make it sound bigger. If you've got the solo guitar panned to the right, then pan the delay to the left. A quarter note delay is personally my favorite, but use a delay setting that compliments the music. Use filters to shape the tone of the delay and make it appear to drift off into the distance. Roll off the low end up to 400Hz and pull back the highs to around 9KHz. If your delay has a feedback setting, adjust it to taste for the echo effect you desire.
These techniques should give you a good starting point to make your solos shine and get all the attention they deserve. Please leave any comments or questions and I'll get back to ASAP.